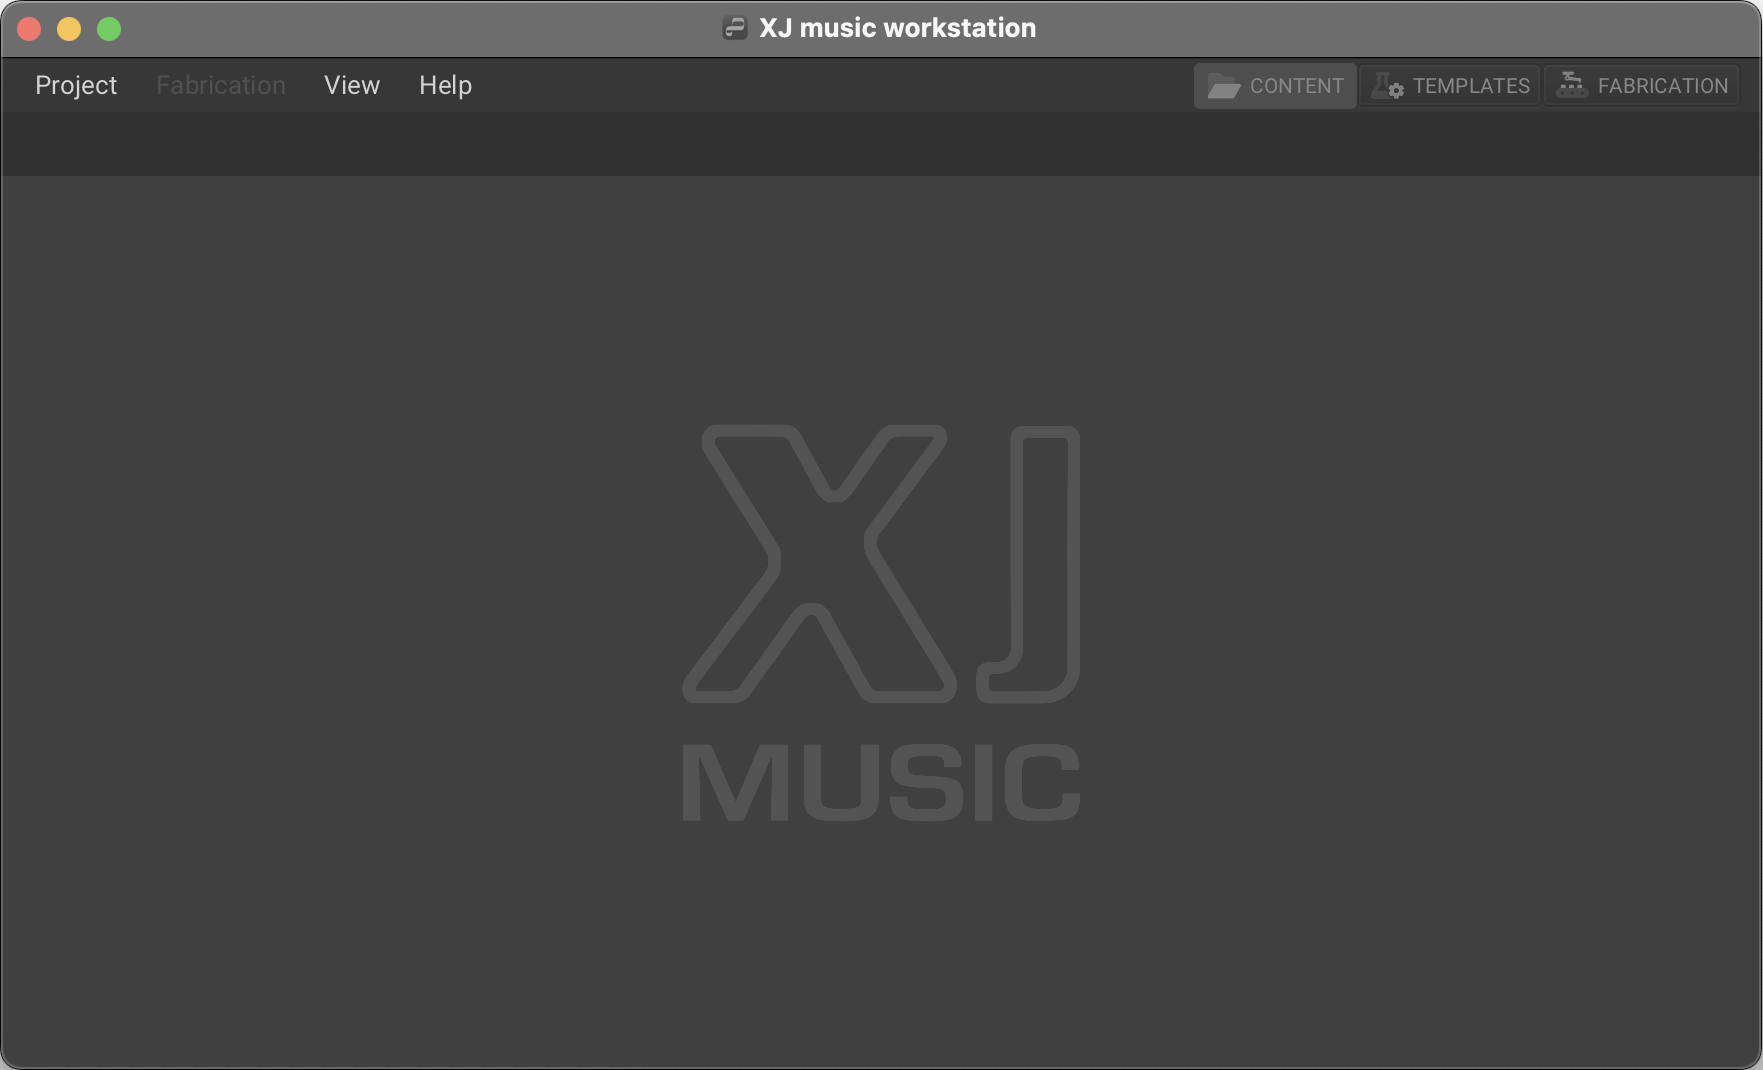
When you first open the XJ music workstation, you’ll see this empty space, because no project is open.
Project Menu
The Project menu provides a comprehensive set of options for managing project files efficiently. Creating new Projects, opening previously created Projects, saving your work, changing directory settings, and quitting the workstation is done here.
Fabrication Menu
The Fabrication menu displays two commands for the fabrication of musical segments, Start (CTRL+Space) and Follow (CTRL+ALT+Space).
View Menu
The View menu contains navigational shortcuts between the Content, Templates, and Fabrication tabs, Log controls, and backward/forward buttons to visit their previously viewed locations.
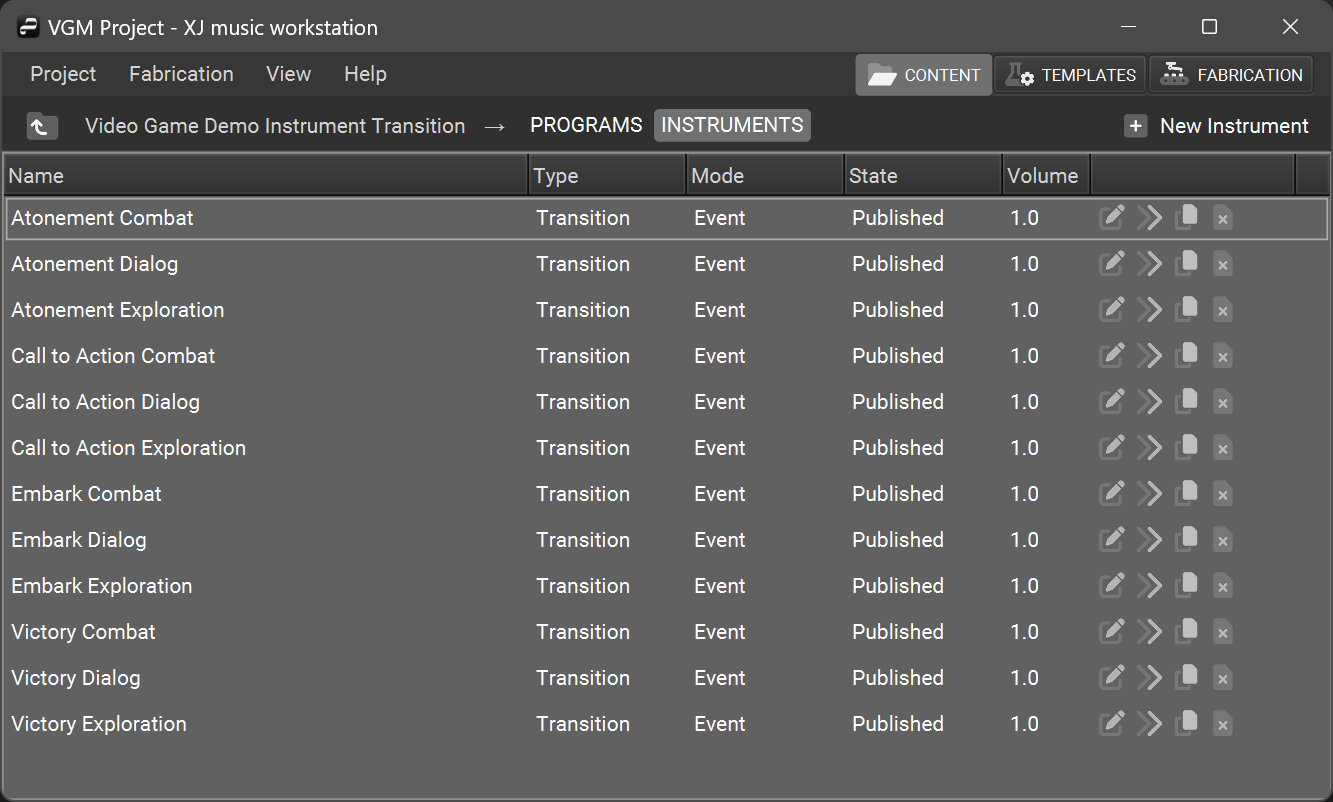
Content Tab
In the Content section of the workstation, you will see the Content Browser which lists
all the the Libraries in the current project. Inside of each Library
is a list of Programs and Instruments.
In the Templates section of the workstation, you will see a list of available Templates in the current project. Templates contain bound Libraries- your Programs, and Instruments.
Fabrication Tab
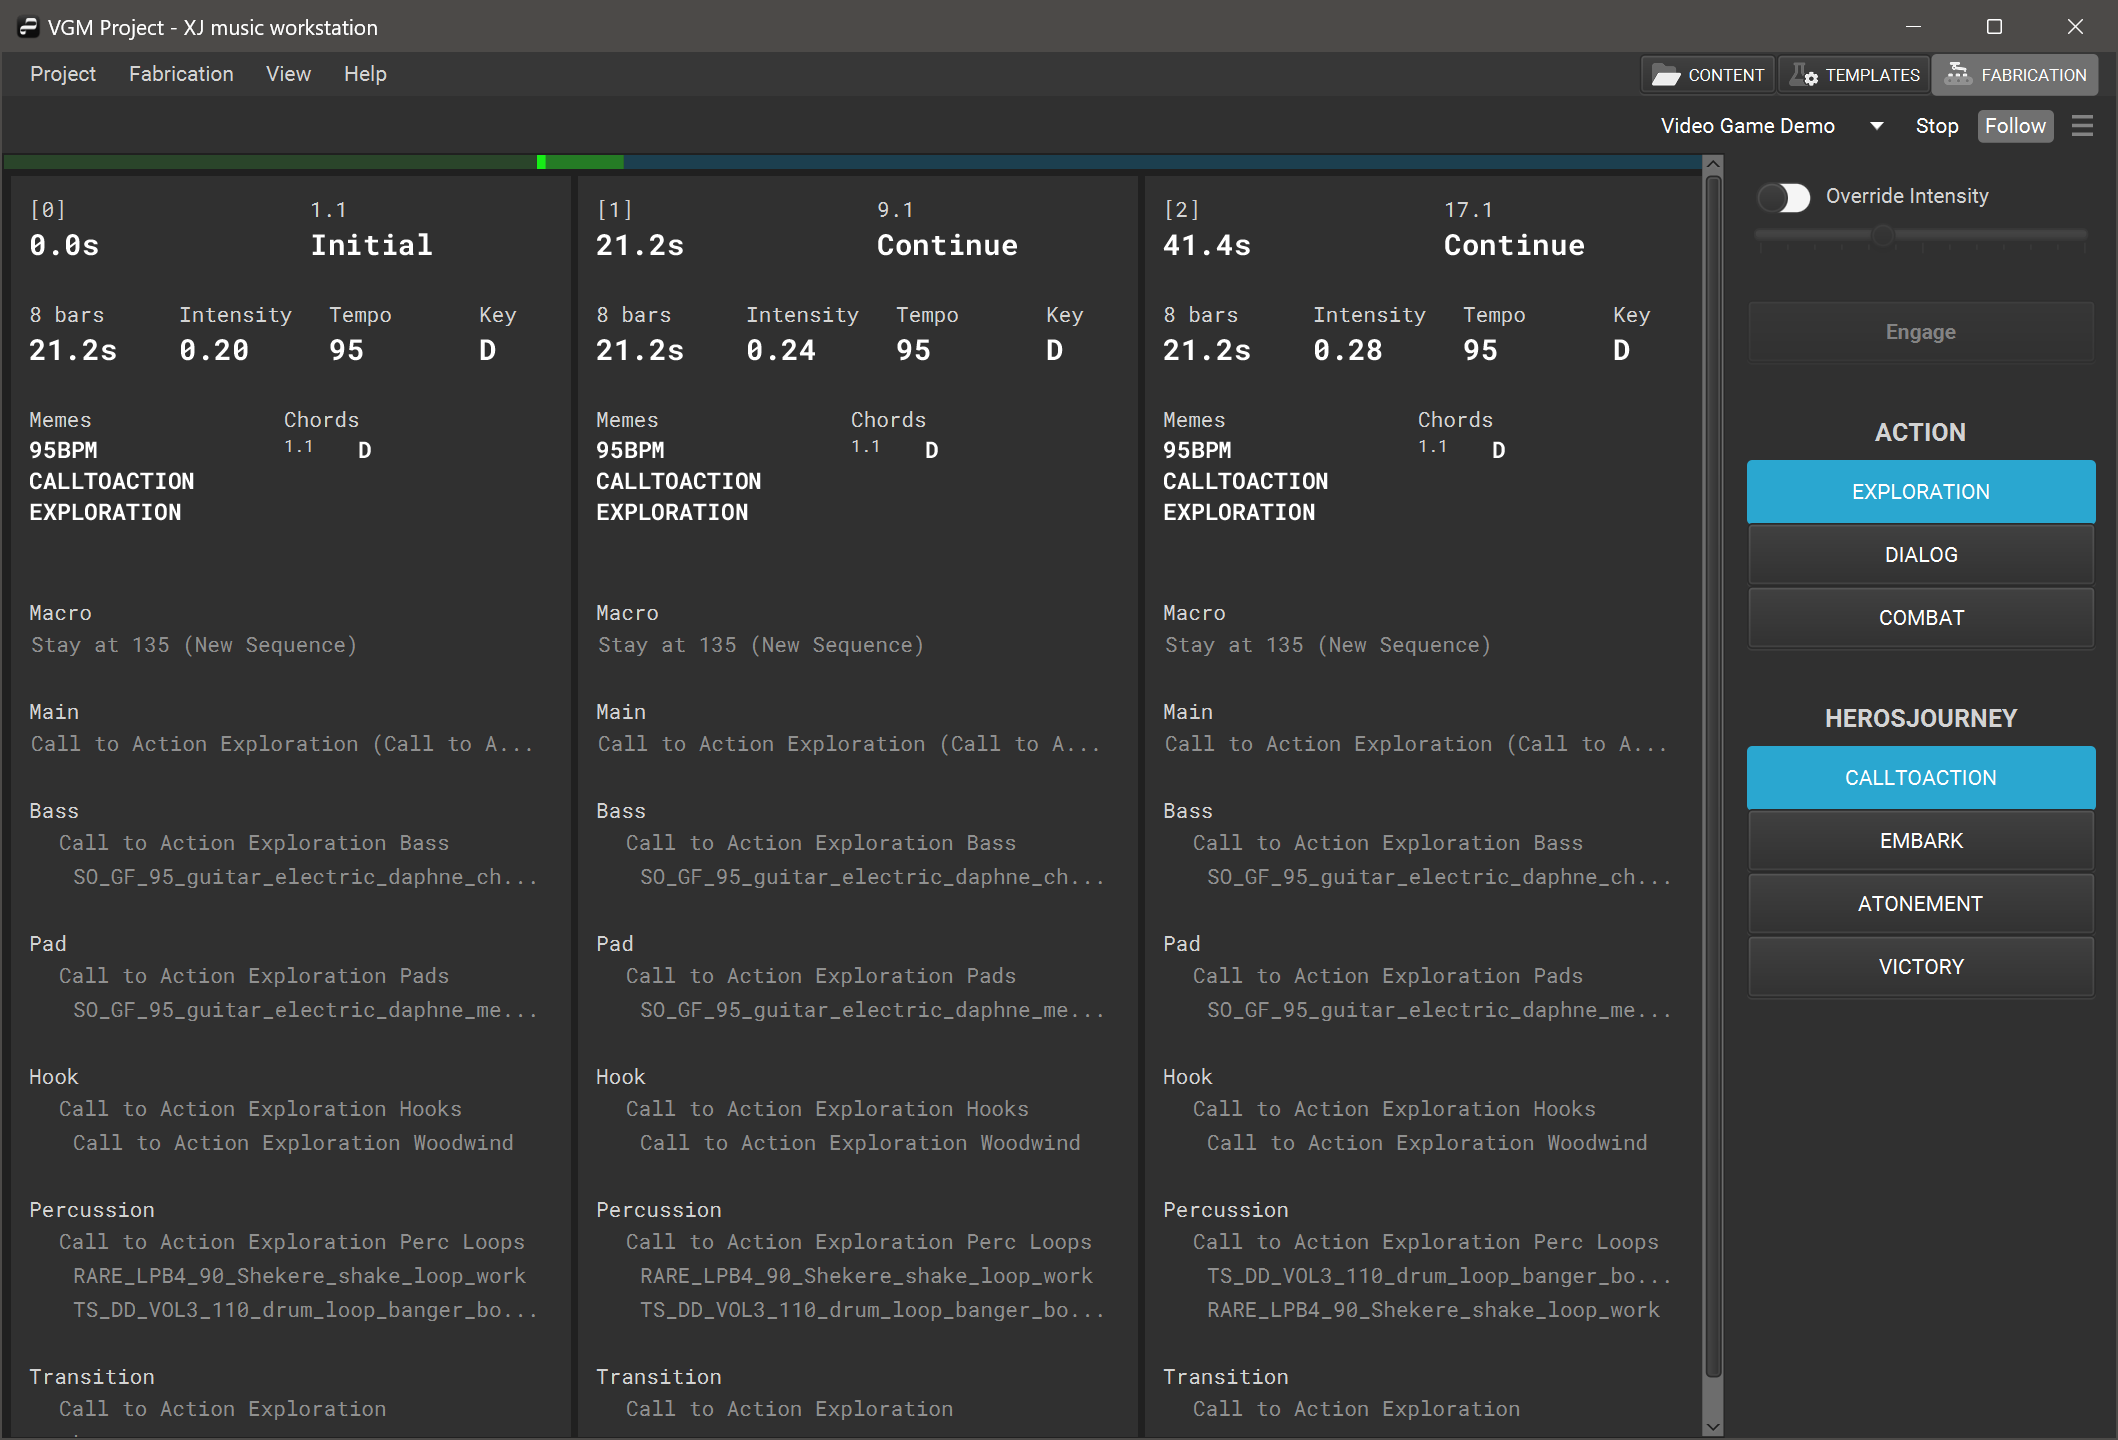
In the Fabrication section of the workstation, you will see another empty space.
If all Libraries have finished loading their data, you can prompt the workstation using the Start button in the top right-hand side, and you will see the playback Timeline displayed!
Subsections of Getting Started
Menu Bar
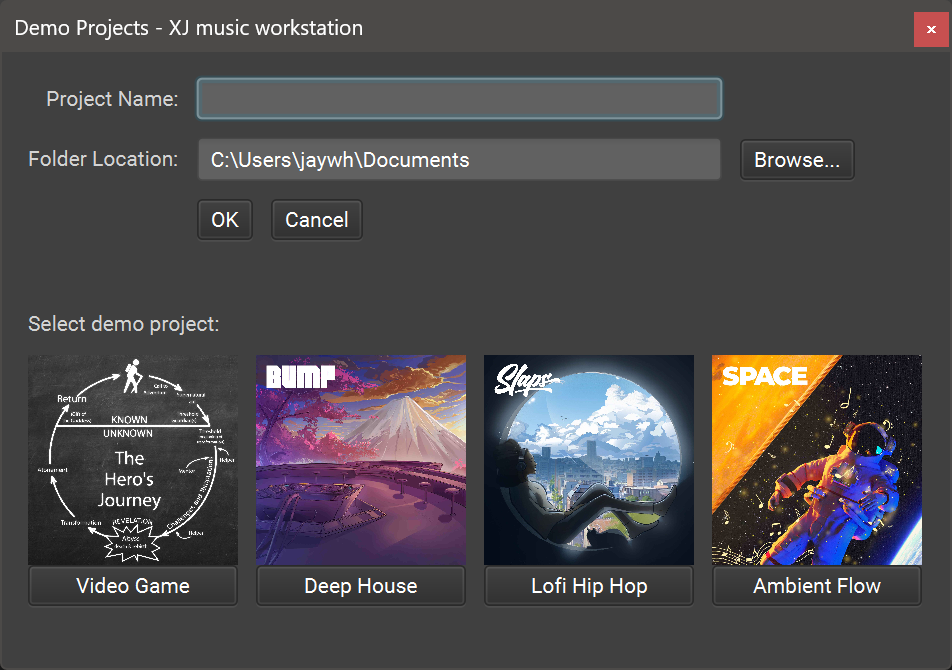
When you first open the XJ music workstation, no project is open. From the Project menu you can create a New Project, Open a Project, or clone one of the Demo Projects to get started right away.
Demo Projects
When first opening the XJ music workstation, the user will have the option of demoing four demo projects from our in-house artists: Bump, Slaps, Space, and The Hero’s Journey. These demos offer users a firsthand experience of the workstation’s capabilities as a platform and can inspire creativity in their own sessions.
To open a demo project, access the Project dropdown menu in the top left-hand side of the workstation, and choose Demos. Here you will find a list of four projects created by our team that will help you get acquainted with what the workstation can do. Select one and click OK to begin loading the project’s data, this could take a few minutes as you will be downloading the included audio files.
View Menu
View Menu
Description
Content (F3)
Switches to the Content tab.
Templates (F4)
Switches to the Template tab.
Fabrication (F5)
Switches to the Fabrication tab.
Show Logs (F10)
Opens the Log window at the bottom of the Workstation, allowing the user to view the status and progress of ongoing processes.
Logs Auto-scroll (Ctrl+F10)
Access tokens from the Lab are pasted here to establish a link between the XJ workstation and the Lab.
Log Level
Allows the user to select which levels of information they will be shown in the logs. There are options to toggle Debug, Info, Warning, and Error logs on and off.
Navigate
Allows you to navigate Back (Ctrl+ALT+←) and Forward (Ctrl+ALT+→)
Help Menu
Help Menu Item
Description
About
Displays the current version of the XJ music workstation.
Tutorial Video
Open a walkthrough video to help you get started with a demo project.
The Content Browser is the central hub for navigating and managing various types of content within the XJ music workstation. Accessible via the Content tab at the top right-hand corner, this main window offers an organized and intuitive view of the available resources, including Libraries, Programs, Instruments, and Audios.
Program Editor
The Program Editor allows you to edit music notation by placing Events within Patterns.
There are different modes of editing available. The editor will automatically show the panels corresponding to the type of program you are currently editing: Macro Program, Main Program, Beat Program, or Detail Program.
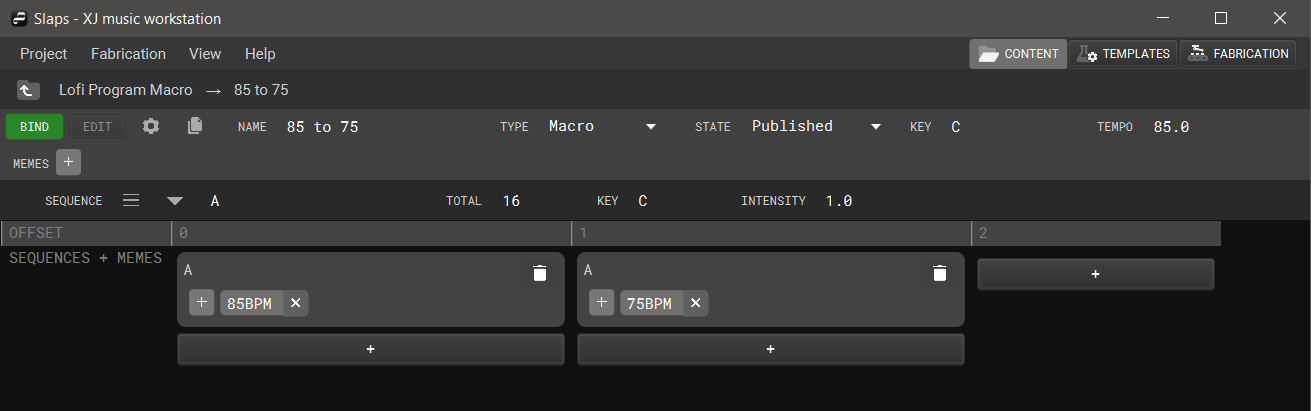
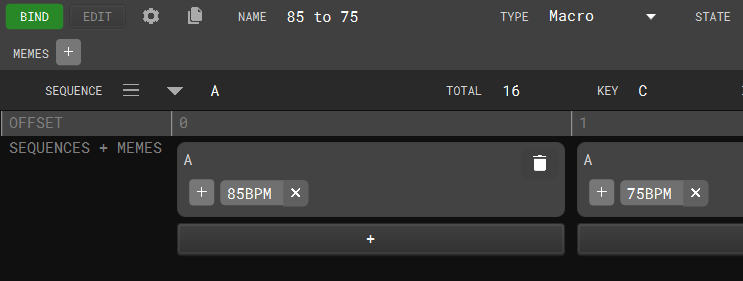
Each sequence of a macro program corresponds to a song a.k.a. main program that will be chosen.
The content of a macro program sequence is irrelevant. We only use a sequence to store attributes such as tempo and intensity. For example, this is how tempo is driven. However, we are waiting on some software enhancements such as XJ Tempo Behavior v2 and a more user-friendly editor mode for macro programs.
First, you’ll create some number of sequences containing attribute values for total, key, tempo, and intensity:
Next, you’ll make sure to be in BIND mode (see the upper left corner) and then bind your sequences into some order. The bindings can have unique memes.
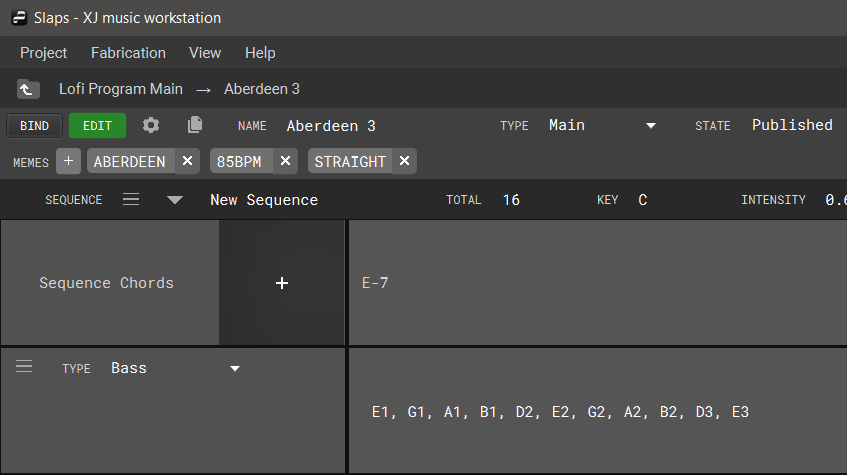
Editing a Main Program
Main Programs contain musical notation describing chord progressions and voicings of those chords for various types of instruments. XJ will look for the chord progression/voicing combinations when the main program has been bound to a template and chosen during playback.
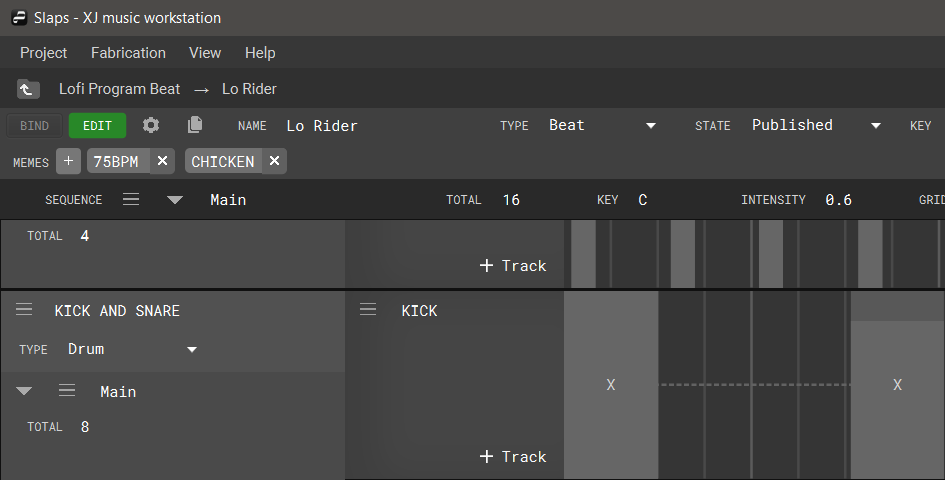
Editing a Beat Program
Beat programs utilize a grid system to graphically represent time, divided into equal segments and measured in bars. When editing a beat program, users place events on the grid by left-clicking within the timeline. To change the positioning, left-click and drag.
With the snap option enabled, events will be dragged to the nearest grid line during placement and modifying duration.
To extend or shorten the length of the event, bring your cursor to either side of the event, click and drag the edges. Double-clicking on an event brings up its event properties menu, which contains Tones, Velocity, Position, and Duration options.
To delete an event, right-click the event and choose delete.
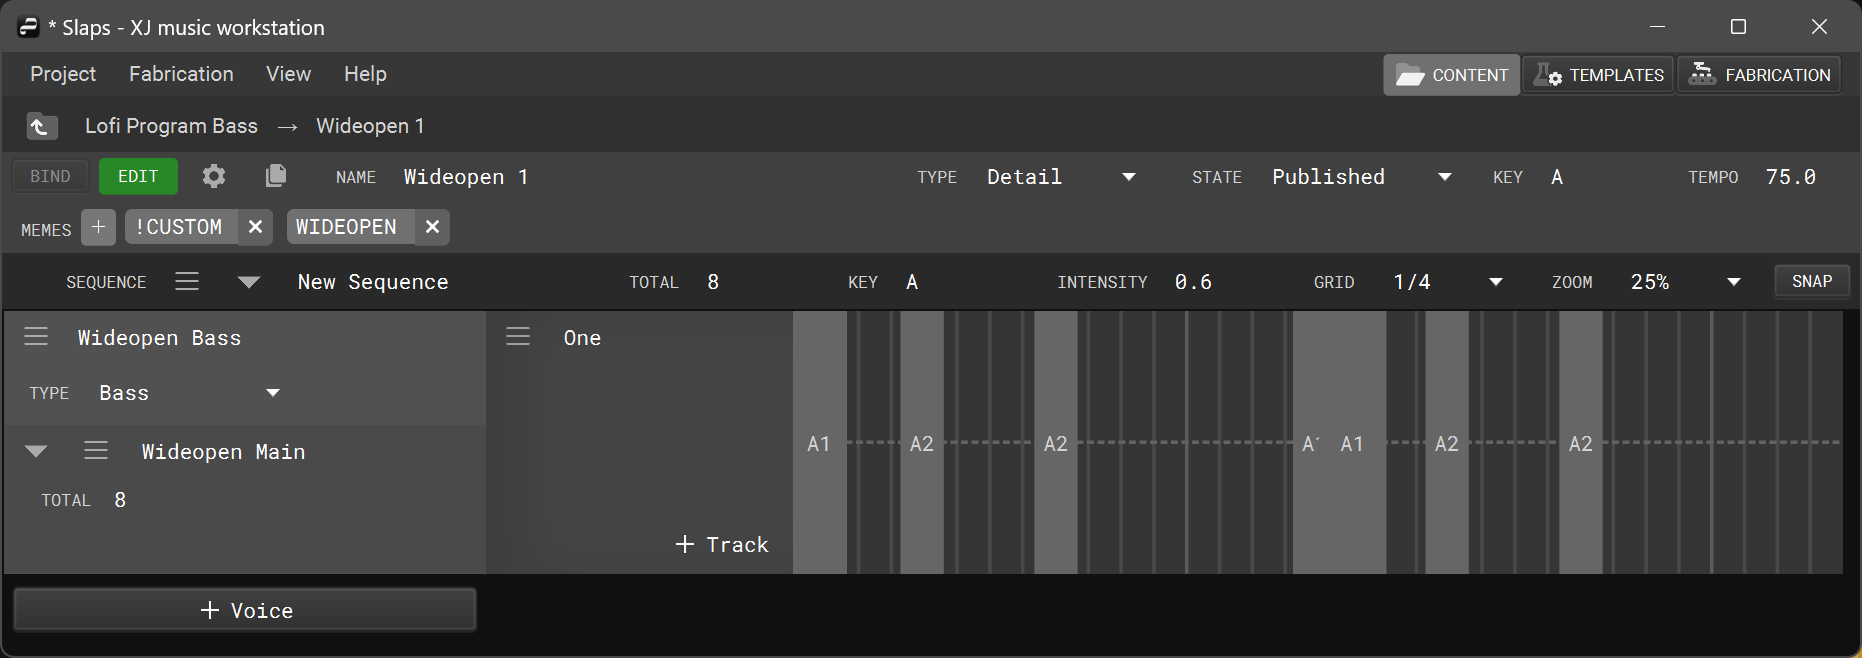
Editing a Detail Program
Detail programs utilize the same grid as Beat Programs, but to coordinate the position, duration, velocity, and notation of melodic events.
Instrument Editor
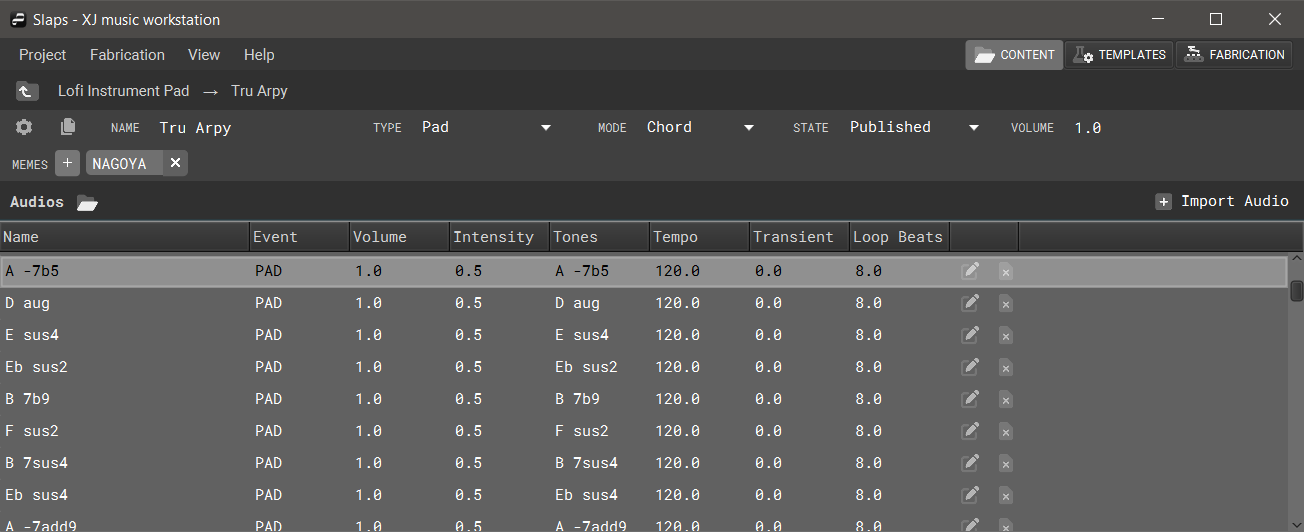
In XJ music, an instrument comprises a set of Instrument Audios. This section covers the importation of audio stems and the corresponding properties for uploaded audio.
Importing Audio
Click the Import Audio button at the top right above the main Instrument window to open your file explorer and choose an audio file to upload. The fiile types currently supported are .wav, .aiff, and .mp3. Upon importing a new audio file, the user will be taken to the audio editor.
Audio Editor
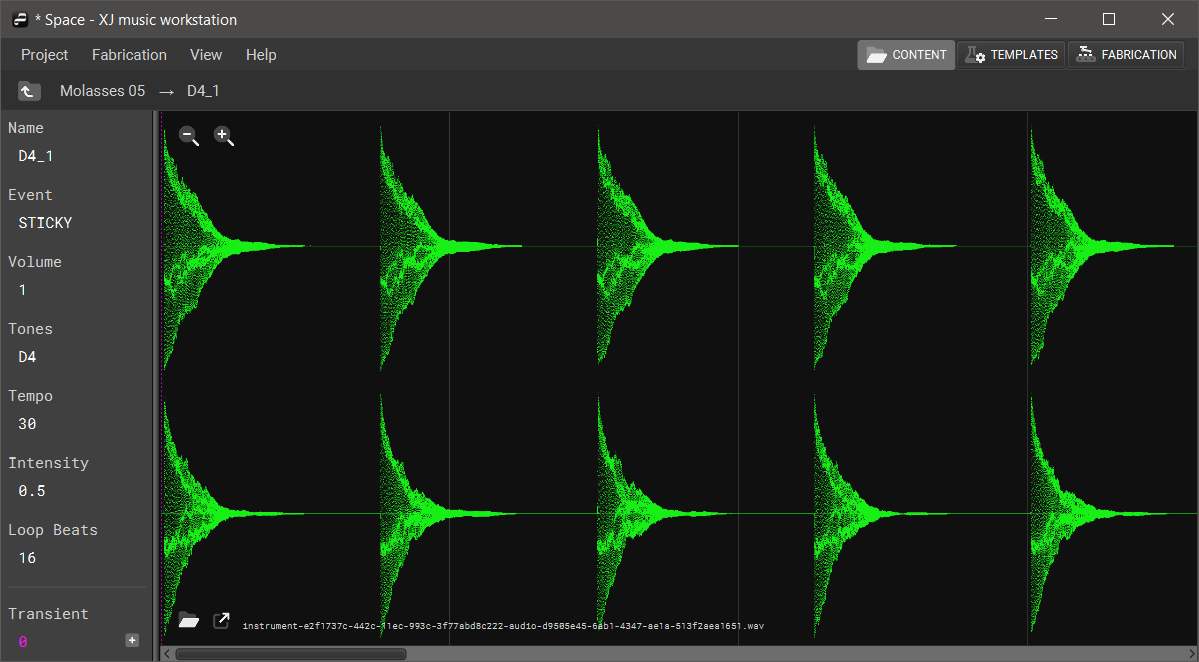
Audio Properties
The properties of the selected audio are listed in the side panel to the left of the waveform viewer and display the name, event, volume, tones, tempo, intensity level, and loop beats length. Underneath the main audio properties panel is a highlighted section containing the numeric value for the transient offset.
Open Audio Folder and Open Audio File
The two icons in the bottom left of the Waveform Viewer will open the selected audio’s folder and open the selected audio file, respectively. The audio’s original filename is displayed to the right of the open selected audio icon.
Setting a Transient Offset
A transient offset is a floating integer that determines in measurements of seconds where the chosen audio will be starting from when its event is slated to trigger. The default transient offset is 0.0, indicating that the audio will start playing at the beginning of its file when triggered. A transient offset of 0.5 will include a pre-roll of 0.5 seconds and begin playing there. To set a transient offset, click the + symbol and place the new offset on the waveform in its window. You can also manuially enter the exact time in the Transient text field.
Waveform Viewer
The waveform viewer component gives the user a graphical representation of the amplitude of selected audio over time, allowing the user to pinpoint peaks and valleys, monitor levels, and synchronize timing.
Use the magnifying glass icons at the top left of the waveform viewer to zoom in and out.
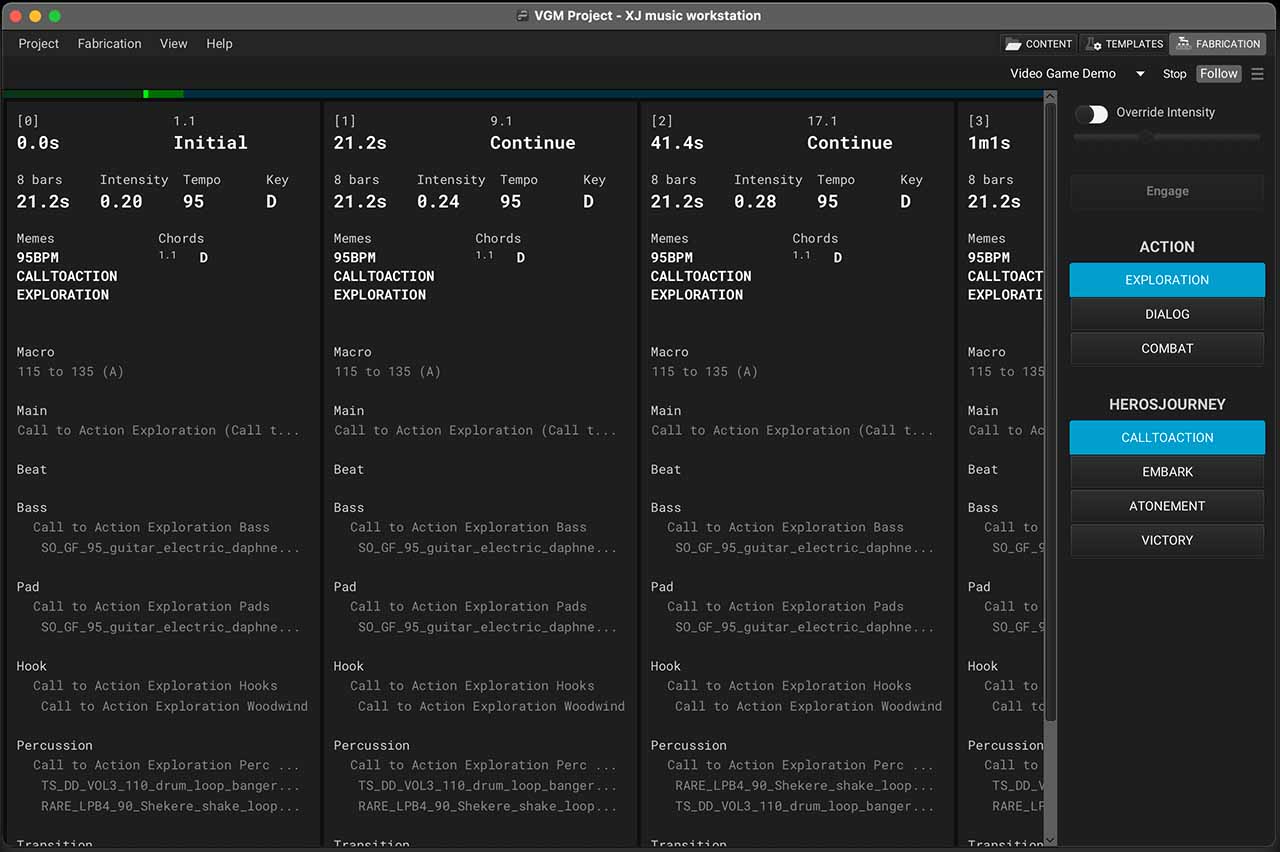
Fabrication Tab
In the Fabrication tab is where you can control the playback of your music. The Fabrication timeline is the command center of the XJ music workstation, offering precise control over your compositions.
There are a number of Fabrication Settings that can be modified to change the timeline behavior and audio output.